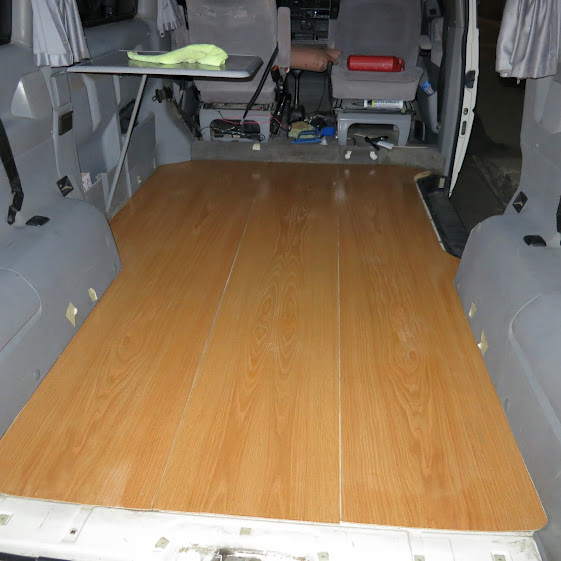
Wood floor
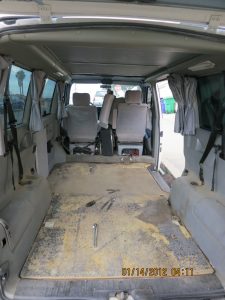
As far as the work for my 1993 Weekender, I started by ripping/removing the old carpet. It required that I use pliers, my hands, a scraper/chisel, a utility knife and a belt sander. I first pulled up the carpet in large pieces trying to peel it off. I’d use the scraper/chisel to get started. Then use pliers and my hand to peel it back. Once the piece was too big/unwieldy, I’d cut it with the utility knife. Then start again. Once I had the wood floor mostly exposed, I used the belt sander to remove the rest of the carpet remnants and adhesive.
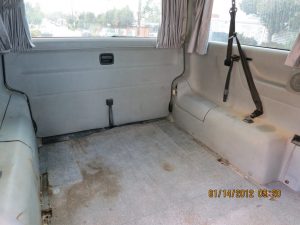
Carpet nearly all removed. Ready to belt sand with heavy grit.
Next, I used large sheets/roll of paper to create a template for each side piece. I did a fair job, but the more care you take here… the better your end result will be. With the long strips (3) of oak veneer 1/8″ that I used, it is important to align your wood pieces because just a little offset can make a big difference. I started with (2) 4′ x 8′ sheets of the 1/8″ oak veneer, pretty inexpensive at a local hardwood shop. I ended up with extra, but one sheet simply wasn’t enough.
Next, I rough cut the wood. Then I placed the side pieces in and adjusted as needed. It really helps to have a Dremel/rotary tool to trim/sand the edges. A better template will minimize this effort.
Once the side pieces were in, I measured the for the center piece width. I anticipated leaving a gap between the wood pieces to give it a nice look that I filled in with black silicone caulking (not show in this photo). It give a pinstripe look at the seams between the 3 pieces of wood.
Then I finished with some cleanup and three coats of a floor grade clear varnish. The rear plastic threshold fit right on the wood nicely. But the side door is somewhat unfinished, as the threshold is curved. I intend to cover it with some rubber/plastic at some point.

I live by the beach. Carpet and sand/wetsuits/surf wax/etc don’t mix very well. This floor has been a great modification to my Eurovan.
Other resources https://vanlife.tv/installing-a-plywood-floor-in-a-vw-t4-transporter-van/
Some other ideas https://goo.gl/6f6nq3